Step 7: Calculation
In step 7 you decide which strategy the tool uses to turn your inputs into a concrete command plan — and you start the calculation.
1. Planning mode
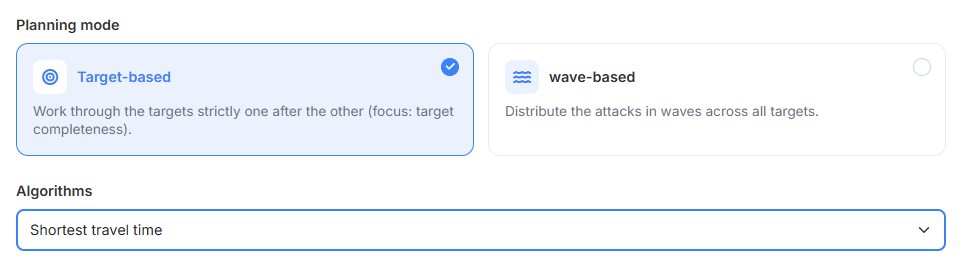
Two selection cards are available:
- "Target-based" — "Works through the targets strictly one after another (focus: target completeness)." The tool plans one target completely; only once it has its nukes, catapult-cleaners, C-splits and fakes does it move on to the next. Sensible when the completeness of each individual target matters more than an even distribution.
- "wave-based" — "Distribute the attacks in waves across all targets." First every target gets one nuke, then every target the second, and so on. Sensible when all targets should end up at a similar level of supply — even if not every target is complete in the end.
2. Algorithm
The dropdown below determines how the tool picks from the possible origin villages. Which entries are available depends on the planning mode and on the world:
- "Watchtower optimized" — tries to avoid or minimise paths through known watchtower radii. Only on worlds with an active watchtower. Additionally shows the section from section 4.
- "Morale optimized" — prefers origin villages with high morale.
- "Shortest travel time" — picks the village with the shortest travel time per target.
- "Longest travel time" — picks the village with the longest travel time per target.
- "Random" — picks at random. Useful when the plan should look as nondescript as possible.
- "Scarcity optimized (Distribution)" — only in wave-based mode. Plans first from those origin villages that can reach the fewest targets in terms of travel time.
The algorithm only works within the permitted pool
Which origin villages the algorithm has to choose from at all depends on the settings of the respective category — in particular on the prioritization of the village categories and the option "Strict prioritization (enforcing order)" set there. An optimal algorithm always only delivers the best result within the permitted pool — not necessarily the globally best one.
Example: you choose Morale optimized and have strict prioritization active, with >2000 axe as the highest category. For one target the tool only finds an option with 80 % morale there — and that one gets planned. That there would have been a village with 100 % morale in the lower prioritized category >1000 axe stays undiscovered: strict prioritization instructs the algorithm to touch lower categories only once no valid option is left in the higher one at all.
If you want to give the algorithm more room, switch strict prioritization off — all switched-on categories then form one common pool.
3. Check before the calculation

The calculation is not started on this page but via the button "Calculate" at the very bottom of the step bar. It is reachable from every step.
Before the actual calculation the tool checks your inputs. If something is missing, it jumps back to step 7 and shows the panel "Missing inputs – calculation not started" with a list there. Every line names the step in which something is missing, for example:
- "Step 2 (Launch times): No launch time window defined."
- "Step 3 (Arrival Times): Arrival time corridor: Please fill in date, start and end time."
- "Step 4 (Attack planning): Snob-Spam - No off category prioritized although targets were added."
- "Step 4–5 (Targets & fakes): There are no attack targets and no fake targets. There is nothing to plan."
If a message concerns a particular category, its name is part of the text — so you see immediately which sub-step is meant.
The calculation runs in the background
Larger plans take a few seconds up to minutes. Meanwhile a status line runs below the button — "Waiting for worker...", then "Calculating..." together with the elapsed time. Do not close the page while it runs; the browser asks before you leave.
Once the calculation is through, step 8. Results is unlocked and the tool jumps there.
4. Watchtower configuration
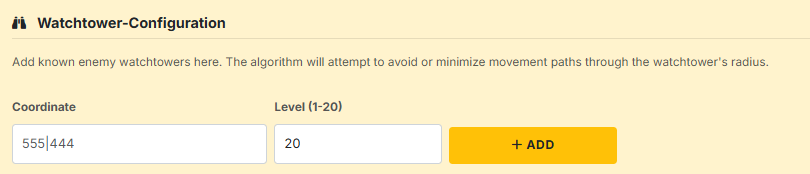
As soon as the algorithm "Watchtower optimized" is selected, this additional section appears.
What the watchtowers are for
Add known enemy watchtowers here. The algorithm will then try to avoid or minimise paths through their radius.
For every watchtower you enter:
- "Coordinate" — position in the format
XXX|YYY. - "Level (1-20)" — the building level; it determines the radius of effect (level 20 corresponds to about 15 fields).
With the plus button the tower moves into the list below, which shows coordinate, player and level. As long as nothing is entered, it reads "No watchtowers."
The circles of effect can be shown on the overall map via the "Watchtowers" chip — that way you see at a glance how much of your attack area is actually covered.
Next up: Step 8: Results.