Step 2: Targets
In step 2 you define which villages are to be nobled.
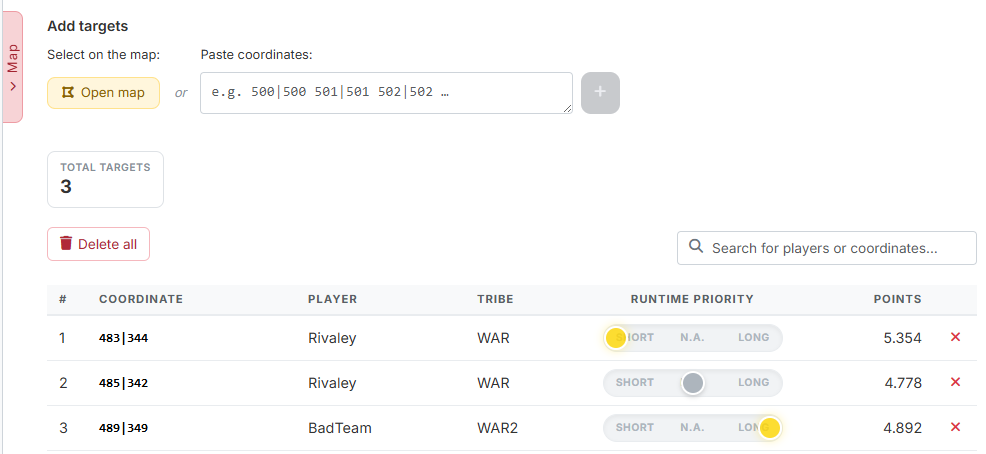
In manual mode this step is locked
If the planning mode is set to "Manual mode", you cannot open step 2 — there, targets are created automatically as soon as you plan a command on the map.
1. Adding targets
Select on the map
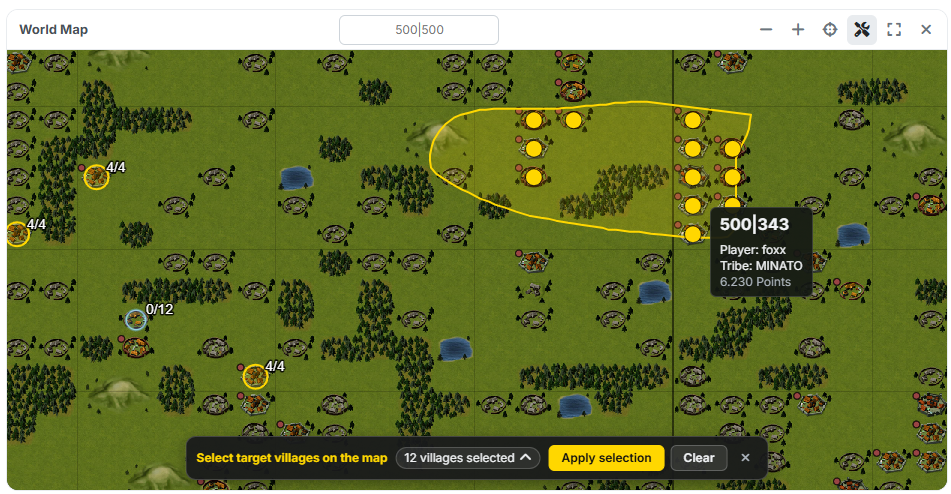
The button "Open map" unfolds the overall map and puts it straight into selection mode. There you click individual villages or drag a lasso around a whole area with the mouse button held down. At the bottom the bar counts how many villages are selected; "Apply selection" enters them into the list.
What cannot be selected on the map
Barbarian villages and your own noble villages are blocked in the map selection. Via the coordinate field you can still enter them.
Paste coordinates
As in step 1 the field accepts any text and picks out the coordinates itself; below it reports back how many it recognised. The plus button puts them into the list.
2. The target list
The metric "Total targets" shows how many targets are recorded. Below it sits the table with coordinate, player, tribe and points. The red × removes a row, "Delete all" empties the whole list; the search field filters by player or coordinate.
3. Runtime priority
The column "Runtime priority" is a slider with three settings and controls from what distance a target is served:
- Short — the target gets its train from the nearest origin village. Good for targets that should fall quickly.
- Long — the target gets its train from the furthest origin village. Good for putting far-flung noblemen to sensible use.
- N.A. — the default, no special treatment.
The order of assignment follows the same logic: the tool serves all Short targets first, then the Long ones and finally N.A. So if you want to be sure that a particular target gets a train, give it Short.
Deleting takes commands with it
If you remove a target for which commands are already planned, those commands go with it.
Next up: Step 3: Settings.