Tab 3: Fake-Planning¶
In Tab 3 you plan all pure fake targets — targets that only receive fakes and aren't hit by actual nukes. Accompanying fakes for real targets are still planned in Tab 2: Nuke-Planning alongside the corresponding nukes, C-Splits and interim cleaners.
1. Arrival time corridor¶
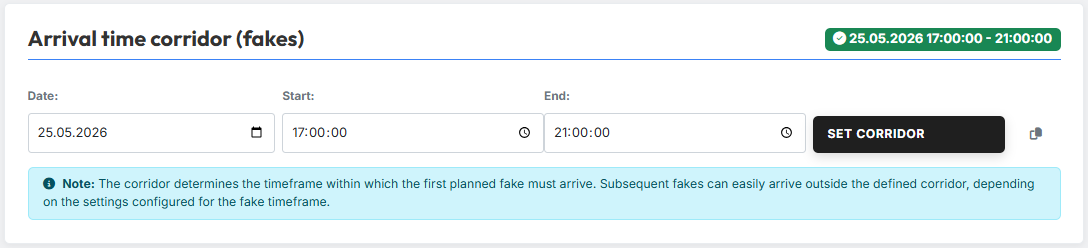
In the "Arrival time corridor (fakes)" section you define the timeframe in which the fakes should arrive. Enter Date, Start time and End time and confirm with Set Corridor — operation identical to Tab 2 §1.
To the right of the Set-Corridor button you also find a small copy button with the tooltip "Copying from attacks". One click takes over the corridor that was set in Tab 2 in a single step — date and times don't have to be entered again.
Corridor applies only to the 1st fake
The corridor defines the timeframe in which the 1st planned fake must arrive. Subsequent fakes can easily end up slightly outside the corridor — depending on the settings for the fake time period (§4.3). It is therefore recommended to leave a sufficient buffer to the night bonus.
2. Two paths to target selection¶
Tab 3 offers two fundamentally different ways to define fake targets:
- Manual selection — you enter the coordinates of the fake targets yourself, just like in Tab 2.
- Automatic selection via reference coordinates — the tool finds the fake targets automatically based on filter criteria (tribe, points, reference coordinates with radius).
Both paths are mutually exclusive: as soon as you've set up targets or filters in one mode, the tool blocks the other (see §3 Choosing the planning method).
3. Choosing the planning method¶
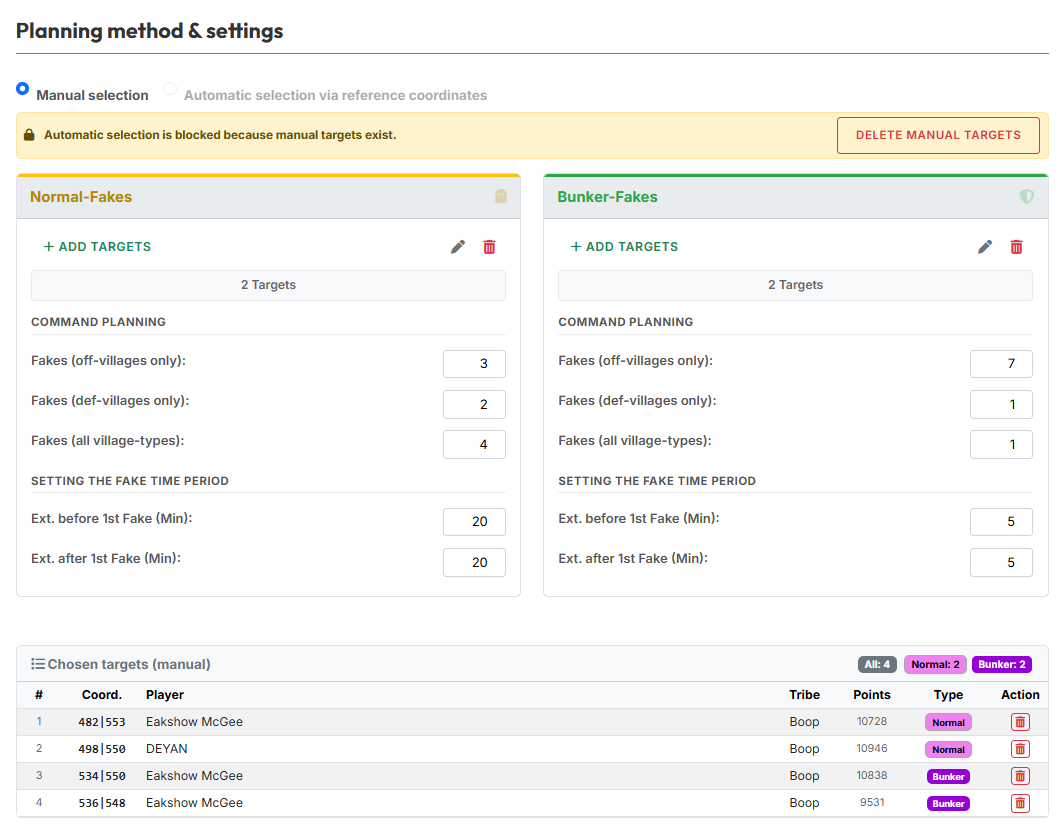
In the "Planning method & settings" section you choose the desired selection mode at the top via two radio buttons:
- Manual selection
- Automatic selection via reference coordinates
Modes are mutually exclusive
As soon as targets or filters are active in one mode, the tool blocks the other one with a yellow info banner.
Only after resetting the blocking mode can you switch to the other one. This way both paths can't be accidentally mixed.
4. Manual selection¶
In manual selection you enter the fake targets yourself by coordinates — the procedure is closely aligned with Tab 2.
4.1 The two categories: Normal-Fakes & Bunker-Fakes¶
In manual mode the tool offers two target categories:
- Normal-Fakes
- Bunker-Fakes
Each category gets its own input area with buttons for adding/editing targets, its own command planning and its own fake time period.
Category names are only a suggestion
The two categories Normal-Fakes and Bunker-Fakes are structurally identical in terms of their settings. The names merely reflect a typical use case but are not mandatory — you could just as well use the two input areas for two arbitrary parallel fake actions.
4.2 Adding & editing targets¶
Each category input area provides the same three controls known from Tab 2: Add targets (opens the modal for entering coordinates), the pencil icon (opens the list of already entered targets) and the trash icon (deletes all targets of the category).
Operation and modal behaviour are identical to Tab 2 — see there for details:
No duplicates across tabs
Targets that have already been planned as real attack targets in Tab 2 are automatically filtered out when added in Tab 3. So no target can be planned twice — neither within the two Tab-3 categories nor across the Tab-2/Tab-3 boundary.
4.3 Command planning per category¶
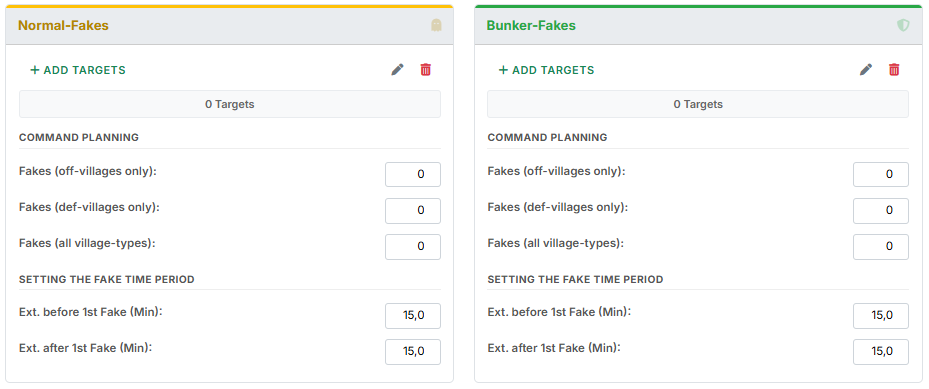
Below the control buttons, each category has a "Command planning" block with three input fields:
- Fakes (off-villages only): — number of fakes that are launched exclusively from offensive villages.
- Fakes (def-villages only): — number of fakes that are launched exclusively from defensive villages.
- Fakes (all village-types): — number of fakes that may be launched from any village type.
Below that follows the "Setting the fake time period" section with two fields:
- Ext. before 1st Fake (Min): — how many minutes before the 1st fake the fake time period may begin.
- Ext. after 1st Fake (Min): — how many minutes after the 1st fake it may end.
The principle is identical to Tab 2 §9: Setting the fake time period — the period defines the window in which the fakes arrive around the 1st planned fake impact.
4.4 Overview table "Chosen targets (manual)"¶

Below the two category input areas, the table "Chosen targets (manual)" shows all entered targets at a glance — with the columns #, Coord., Player, Tribe, Points, Type (badge Normal or Bunker) and Action (delete icon per row).
In the top right you'll find three counter badges (All: N, Normal: N, Bunker: N) as a quick overview of the number of targets per category.
5. Automatic selection via reference coordinates¶
In automatic mode the tool takes over the target search for you — you only steer it via filter criteria.
5.1 Basic idea¶
As soon as automatic selection is active, by default the entire world is registered as the potential fake-target pool. You then narrow this pool down step by step via:
Depending on the filters set, the hit list is reduced live (see §5.5 Targets found (Live)).
No duplicates across tabs
In automatic mode too, the tool filters out all targets that have already been planned as real attack targets in Tab 2. So Tab-2 and Tab-3 targets are guaranteed to stay disjoint — no target is planned twice.
5.2 Target filters¶

In the "Filter Targets" area two filters are available:
- Filter Tribes (If let empty = All): — enter one or more tribe tags. If the field is left empty, the status "No restrictions (Whole world)" is shown and all tribes remain in the pool.
- Points filter with checkbox "min. points" + input field — only villages above the specified score are considered as fake targets.
5.3 Reference coordinates¶
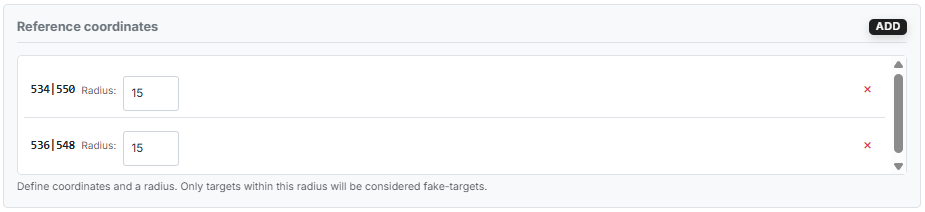
In the "Reference coordinates" area you can narrow the search range geographically. Via the Add button you open the modal "Add center" and enter a coordinate and a Radius (fields) there.
Multiple centers are possible — each center is its own circle with its own radius. All villages that lie inside at least one of these circles are considered.
As long as no centers are defined, the UI hint applies: "Define coordinates and a radius. Only targets within this radius will be considered fake-targets."
5.4 Command planning & intervals¶
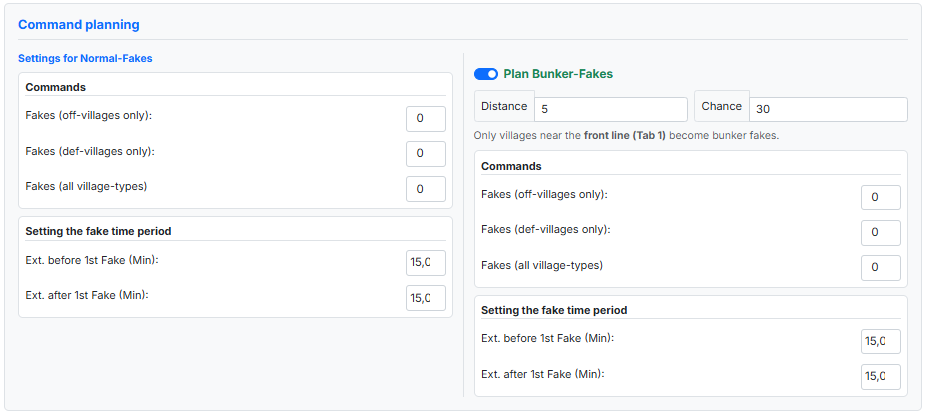
In the "Command planning" area there are two blocks side by side.
Left side — Settings for Normal-Fakes: The command planning for Normal-Fakes is structured identically to the manual mode — i.e. the fields "Fakes (off-villages only):", "Fakes (def-villages only):" and "Fakes (all village-types):" plus "Ext. before / after 1st Fake (Min):" under "Setting the fake time period". See §4.3 Command planning per category for details.
Right side — Bunker-Fakes: Via the slide switch "Plan Bunker-Fakes" Bunker-Fakes can additionally be activated. These are determined dynamically based on the front line set in Tab 1, and controlled via two parameters:
- Distance (tooltip "Maximum distance to the front line") — how close an enemy village must lie to the front line to qualify as a potential Bunker-Fake at all.
- Chance % — the probability with which such a near-border village is actually marked as a Bunker-Fake.
The UI hint below summarises this: "Only villages near the front line (Tab 1) become bunker fakes."
Below the slide switch follow — like for Normal-Fakes — separate fields for command planning and fake time period for the Bunker-Fakes.
5.5 Targets found (Live)¶
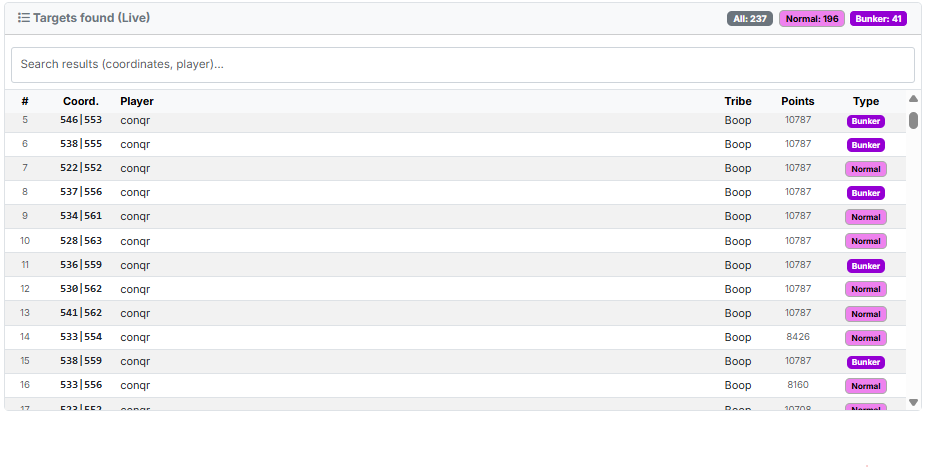
The table "Targets found (Live)" shows the current result of the filter chain in real time — as soon as you adjust filters, centers or the Bunker-Fake switch, the list updates immediately.
The columns correspond to those of the manual overview (#, Coord., Player, Tribe, Points, Type). Via the search field above the table you can filter for specific coordinates or player names. The counter badges in the top right (All: N, Normal: N, Bunker: N) show how many targets are currently in the pool per category.
6. Visualization & Preview¶
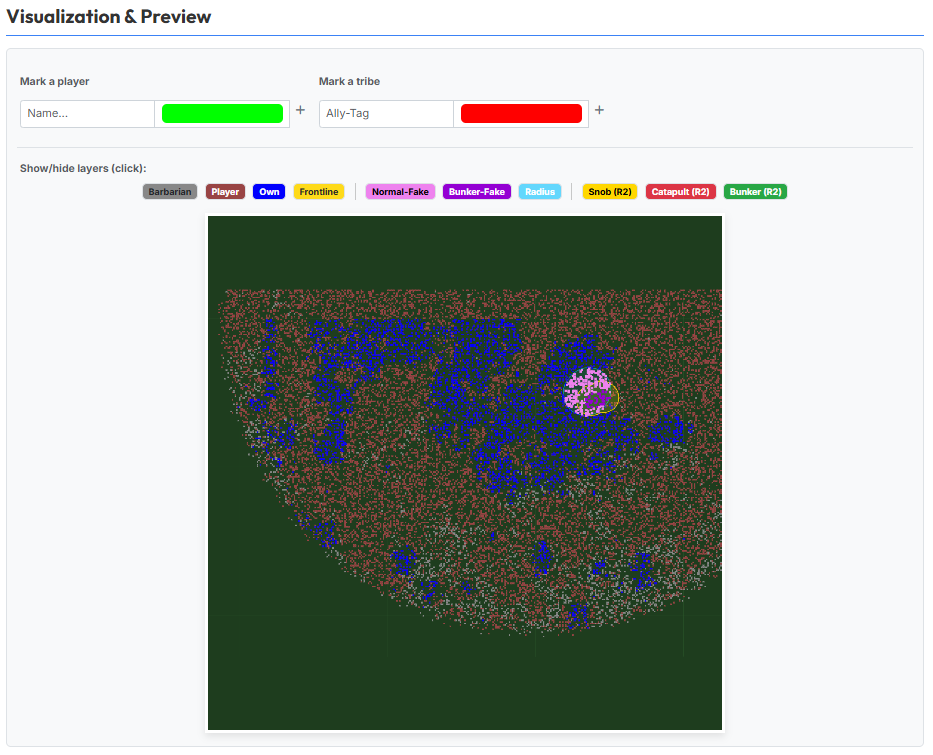
In the "Visualization & Preview" area you can inspect the planned fake distribution on the world map.
Two input fields let you specifically highlight a player or a tribe:
- Mark a player: — enter a player name to mark this player green on the map.
- Mark a tribe: — enter a tribe tag to mark the entire tribe red.
Via the button bar "Show/hide layers (click):" any number of layers can be toggled on/off:
- Barbarian, Player, Own — the three village-type layers.
- Frontline — the line calculated in Tab 1.
- Normal-Fake, Bunker-Fake — the targets planned in this fake-planning.
- Radius — the reach circles of the defined reference coordinates.
- Snob (R2), Catapult (R2), Bunker (R2) — the real attack targets already planned in Tab 2 (R2 = Tab 2). This way fake targets and real targets can be inspected side by side on one map.
After successful fake-planning you continue with the final calculation in Tab 4: Calculation.